
Quickstart
Get AgentMux running with your first agent in a few minutes.
1. Install AgentMux
Section titled “1. Install AgentMux”Download it from GitHub Releases (or the buttons on agentmux.ai):
- Windows (x64): the Microsoft Store, the
.exeinstaller, or the portable.7z - macOS: the
.dmg, Apple Silicon only - Linux (x86_64): AppImage,
.deb,.rpmor portable.tar.gz
See Installation for the steps on each platform.
2. Launch and orient
Section titled “2. Launch and orient”AgentMux opens a starter layout of three panes:
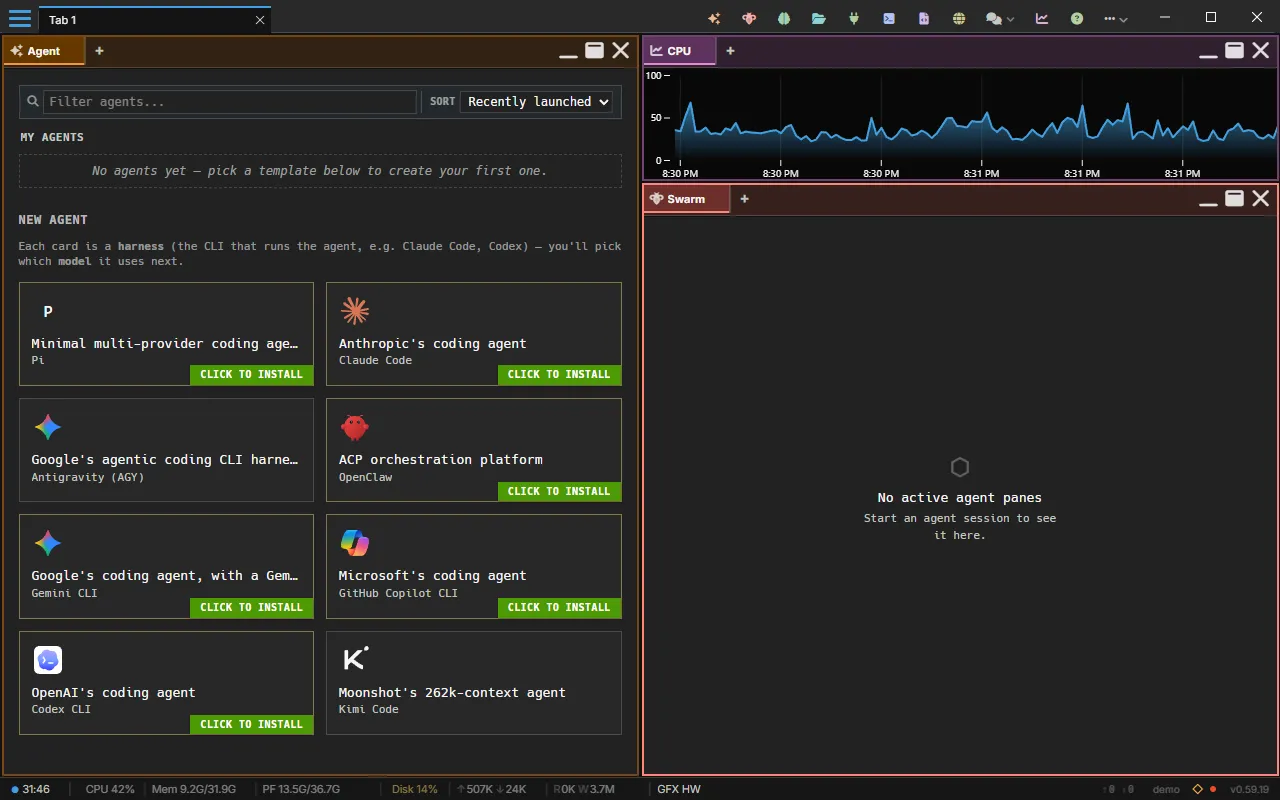
- Agent (left): the agent picker.
- Sysinfo (top right): live system metrics. Right-click it to choose what it plots.
- Swarm (bottom right): a live tree of your agent panes, with their subagents, todos and running tools.
Around the panes:
- Title bar: tabs, the widget bar (pinned Agent, Swarm, Memory, Hangar, Connectors, Terminal, Editor, Browser, Messengers, Sysinfo and Help, with the rest under more), and the hamburger menu (≡).
- Status bar (bottom): backend status, CPU, GPU, memory, disk and network stats, token usage, and the AgentMux version. Click the version for instance details.
See The window for each part of the window and the panels the status bar opens.
3. Create your first agent
Section titled “3. Create your first agent”In the Agent pane, under New Agent, click a harness card, for example Claude. Each card is a harness, the CLI that runs the agent. A panel opens under the card with the steps below; it shows only the ones that apply.
- Install the CLI. If the harness’s CLI isn’t installed yet, its card shows Click to install, and the panel starts with the install. Click Install now. It needs an internet connection, and Node.js and npm (Claude Code also needs Git). If they’re missing, the panel lists them first with an install option; click Check again once they’re installed.
- Fill in the new agent’s fields. Give it a Name, for example Reviewer. For Runtime, choose On this computer (host); the Claude template preselects the container runtime when Docker is running. Leave Bundles empty for now. There’s no account field: the agent takes your first Claude account, or signs in when it starts if you have none. Click Create and start.
- Sign in. Claude Code only starts with an account bound to the agent. Without one, the pane shows Not signed in or No account linked. Click Log in and finish the login in your browser. For Claude Code, paste the authorization code back into the pane if it asks for one. AgentMux saves the login as an account in Connectors → Accounts and binds it to the agent. See Auth flows.
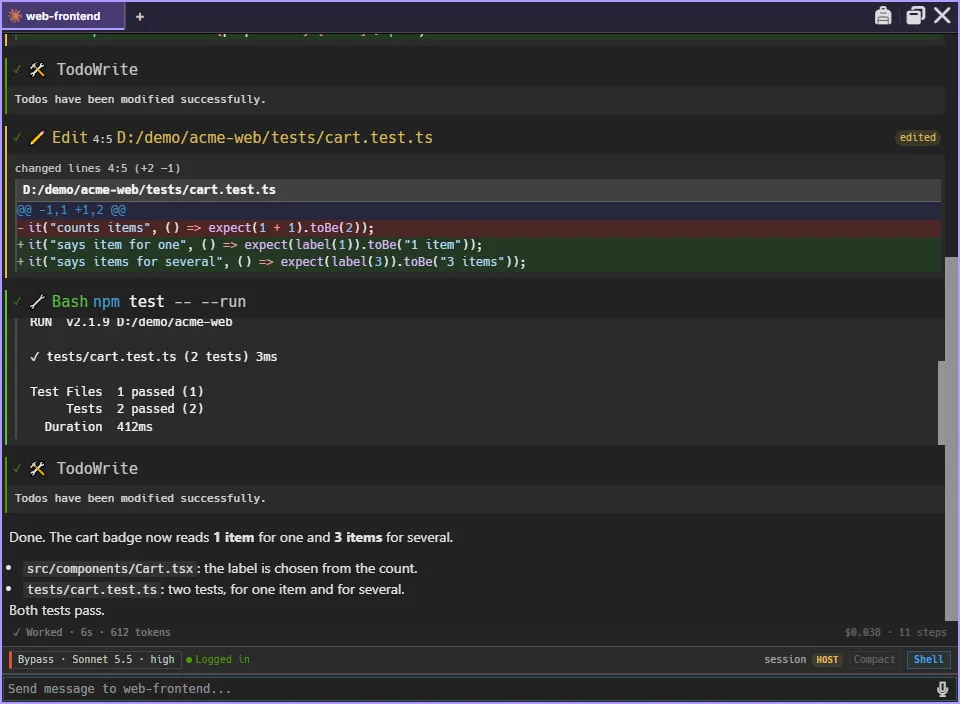
The agent then starts in the pane. Type a message and press Enter to send it; Shift + Enter adds a new line. You’ll see the agent’s reply stream in, each tool call as it runs, and diffs of the files it edits. Press Esc in an empty message box to interrupt a running turn. Start a message with ! to run a shell command in the agent’s working directory instead. Type /quit (or /exit) to end the agent and close its tab; the conversation is kept.
See First Agent Setup for the details of every step.
4. Add more panes
Section titled “4. Add more panes”macOS keys are in brackets.
| Action | Keys |
|---|---|
| Split right (opens a terminal) | Ctrl+Shift+D (⌘D) |
| Split below | Ctrl+Alt+Shift+D (⇧⌘D) |
| Move focus between panes | Ctrl+Shift+Arrow, or F6 |
| Open the command palette | Ctrl+Shift+P (⇧⌘P) |
A split opens the new pane beside the one that has focus:
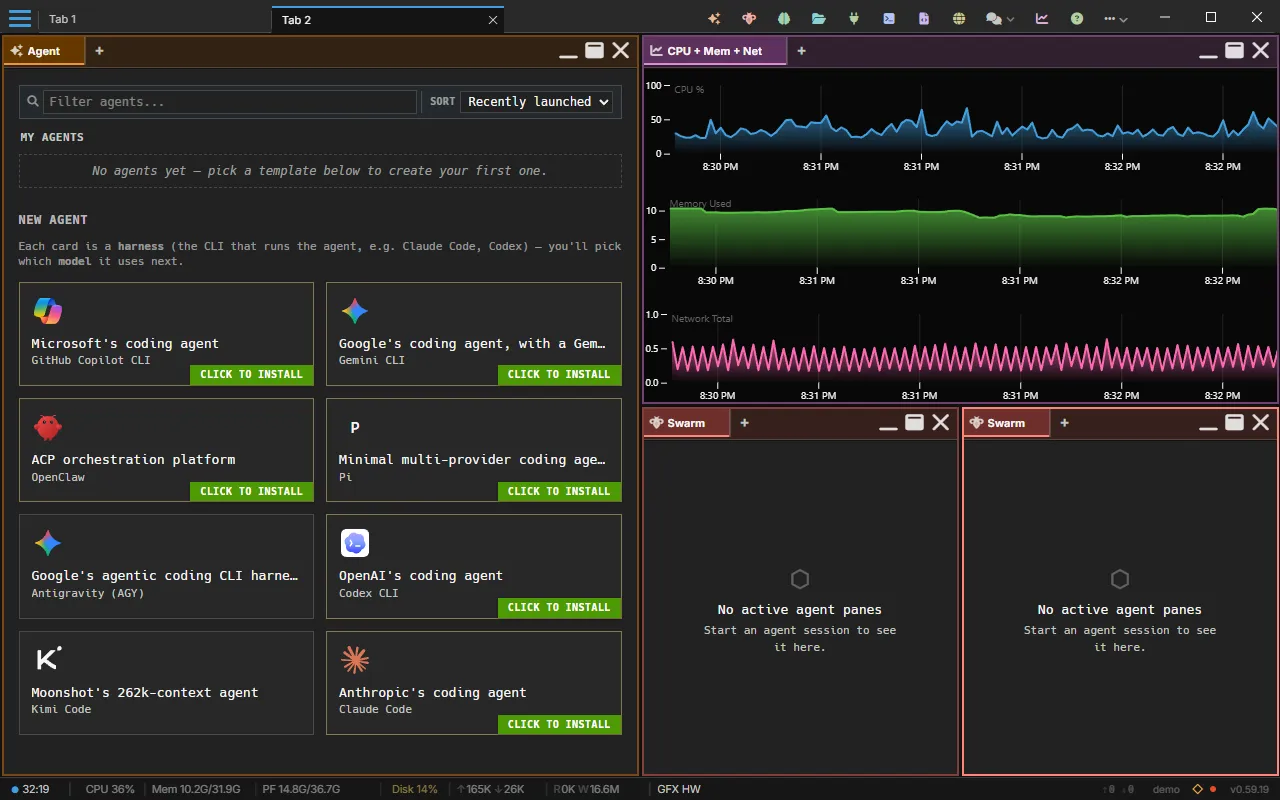
To start a second agent, click Agent in the widget bar (or run Open Agent from the command palette). The new Agent pane shows the picker again: create another agent, or pick one from My Agents. Agent names must be unique, so give a second agent from the same template a new name.
Each agent is independent. Agents don’t share context unless they message each other (see Interagent Comms).
5. Add instructions with a bundle (optional)
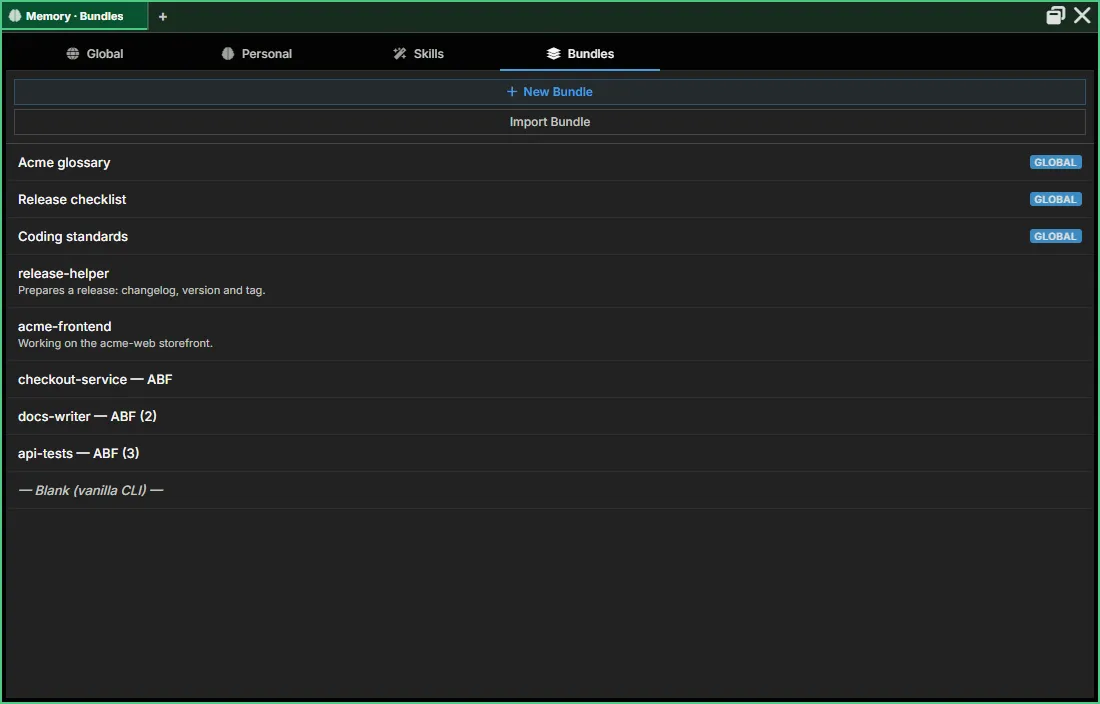
Section titled “5. Add instructions with a bundle (optional)”A bundle is a reusable set of instructions, MCP servers, memory and skills. Create one from Memory → Bundles → + New Bundle (click Memory in the widget bar). Enter a Name, add Instructions, then click Save. A bundle works with any agent, whatever harness it runs. Add it under Bundles when you create an agent, or later from the agent’s Stash → Bundles. See Bundles.
Next Steps
Section titled “Next Steps”- First Agent Setup: every provider and option in detail
- Auth flows: how sign-in works per provider
- Keybindings: all keyboard shortcuts
- Pane Types: all available pane types
- Configuration: customize settings